Showing posts with label crafts. Show all posts

Friday, 16 May 2014

Craft - easy sew Dorian the Tortoise

I had it in my head that I wanted to try a sewing project, an easy one to get me started. I was searching around and came across this exceptionally cute pattern and instructions for a toy turtle from Purl Bee. The tutorial is for a cushion-sized toy in a Liberty print. Unfortunately Liberty fabrics are a little pricey, although they are the best, so I used a bit of upholstery fabric for mine. Plus I decided I wanted mine to be a tortoise rather than a turtle.


What you'll need:

  • Fabric of your choice for the shell and soft parts (head, feet etc)
  • Felt for the underside
  • Sewing kit
  • Buttons for eyes
  • Stuffing
  • This template from Purl Bee - print it off at whatever size you want your tortoise and cut it out

Step 1. Cut your fabric from the template and work out what goes where.


Step 2. Take one shell piece, the correct way up, and pin the feet, arms, tail and head on top of it, as shown:


Step 3. Sew in place. This would be so much easier if you had a sewing machine (which I don't), but I managed fine sewing by hand! Then fold out the blue pieces and iron the seams away inside the shell. You should then end up with a tortoise shaped piece.

Step 4. Repeat steps 2 and 3 for the other side of the tortoise. You should end up with two opposite-facing tortoise silhouettes. 


Step 5. With the correct sides together, pin your tortoise shapes together, leaving the underside open. Sew together.
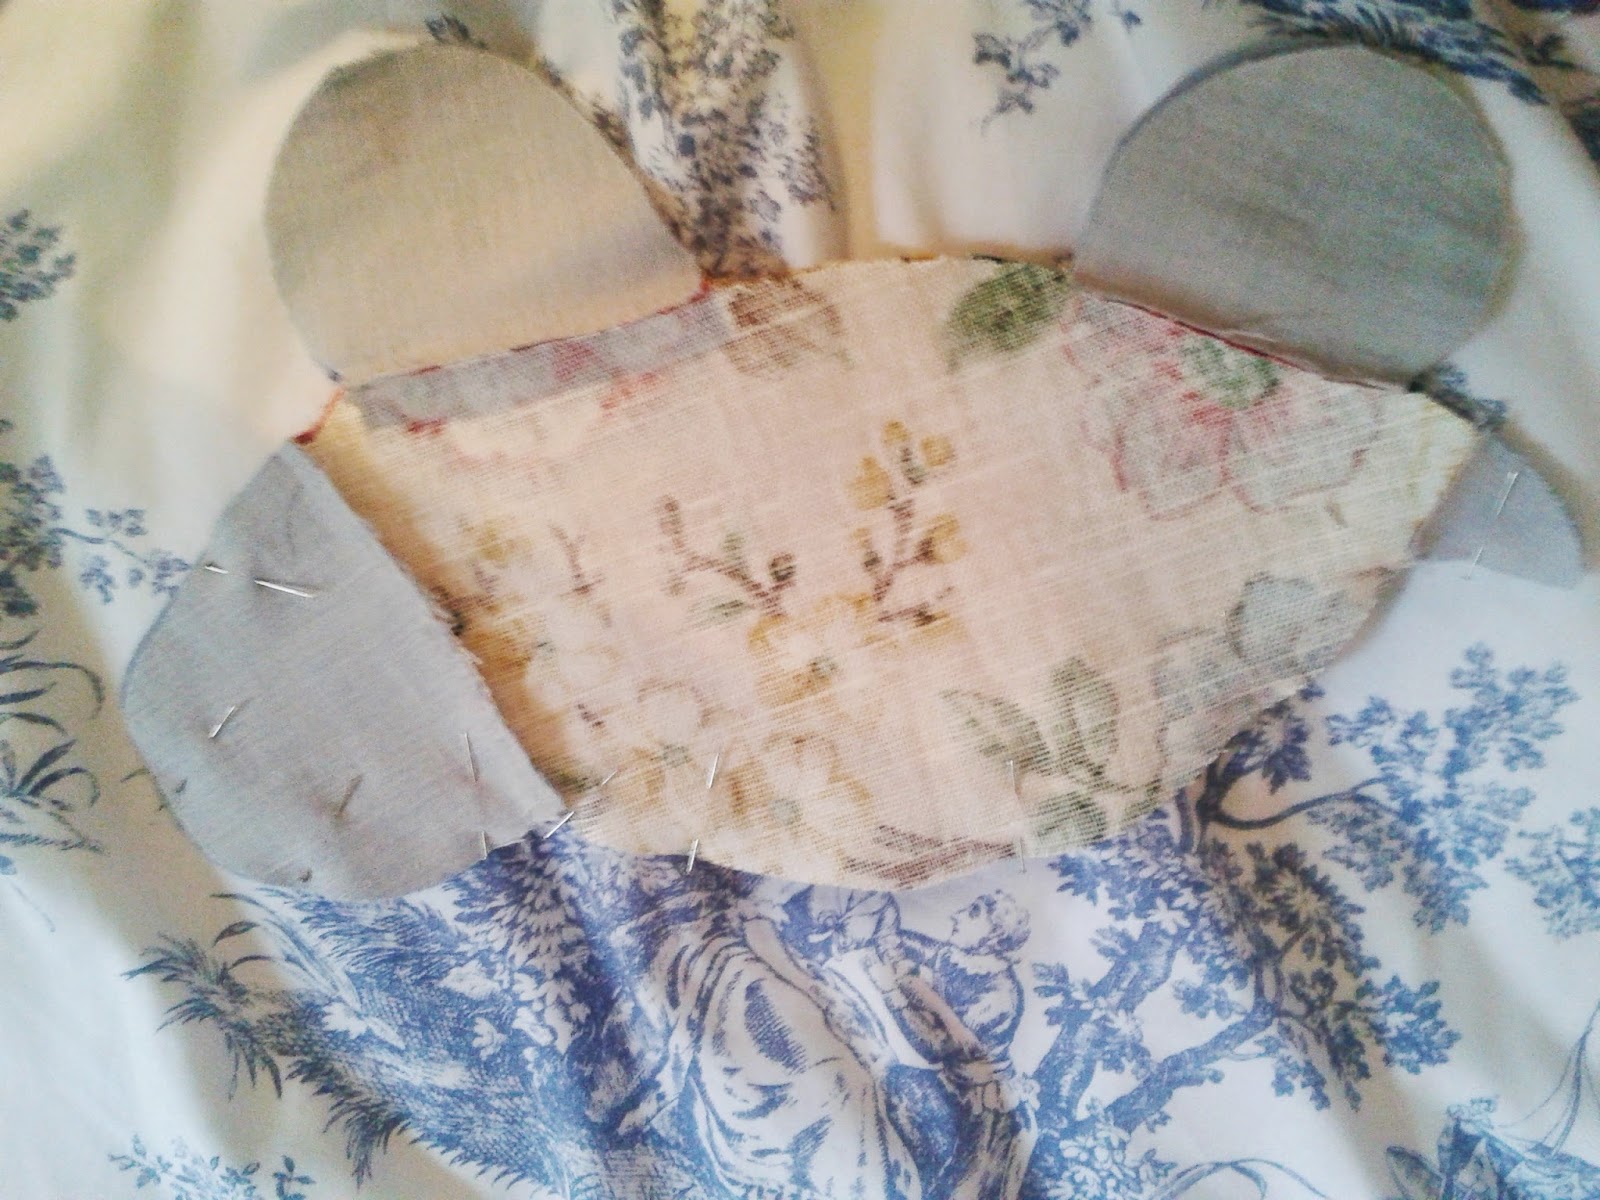

Step 6. Open up your tortoise and place it (still inside out) onto your felt underside. Pin in place and stitch together, leaving a gap at the back. Turn the right way out.

Step 7. Fill with stuffing. You can buy toy stuffing in craft shops but I was impatient so just used bits of fabric, old socks etc. Alternatively, fill him up with rice and dried lavender for a heavier, sweet-smelling pillow.


Step 8. Stitch together the opening. Give him some eyes by sewing on some buttons.


Isn't he cute? He took me a couple of hours to make, but it'd be super speedy (ironically for a tortoise) if you used a sewing machine.

Monday, 5 May 2014

9 brilliant, cheap and easy crafts and gifts

I decided to do a round up of some of the amazing crafts and DIYs I've come across on Pinterest over the last few weeks. There's a real range of ideas here so hopefully there will be something for everyone! I definitely want to try these all out one day.


This looks really easy and you can customise the shape, size and colours to your taste. (Beauty and Bedlam)


These will brighten up any notice board! You could also make them with little magnets to go on the fridge. (Sarah Hearts)


So pretty and so simple. They'd be really lovely for Christmas in reds and greens as well. (The Benson Street)


Recycle an old jumper for cosy toes. (Most Interesting Things)


One of my own! But one of my favourites. (Anna Louise at Home)


A great and simple way to make personalised coasters (One Good Thing)


An amazing Ikea hack! (Ikea Hackers)


Really sweet idea for the garden - vintage tea cups can be found in pretty much every charity shop! (Modern Magazin)


This one might well be my favourite - I just need to get hold of a glue gun before I try it! (Whats Ur Home Story)

Hope you have fun trying these out for yourselves!

Sunday, 4 May 2014

Craft - pressed flower ornament

This is a quick how-to for something which I've had for a really long time and have taken all over the place with me. It's really easy and also makes a really nice gift.


What you'll need:

  • Flowers - freshly picked and cut to the right size
  • Flower press (or heavy books and plain paper)
  • Photo frame - I used this one from Ikea (http://www.ikea.com/gb/en/catalog/products/00075689/) 
Step 1. Choose and pick your flowers. My sister and I picked these flowers on the day my grandfather died and decided to press them as a way of commemorating him (he was Welsh, so thus the daffodils!)


Step 2. Press your flowers. If you have a flower press, you just need to slip them in between the layers of sheets, tighten the screws and wait for about a week. If not, just put your flowers between two pieces of clean plain paper (ideally some sort of blotting paper) and place between the pages of a heavy book. The more you weight it down, the better it will work.

Step 3. Put them in your frame. I loved this frame from Ikea because it displays the flowers but also works as a paper weight and is completely free-standing. I wanted the blooms to reflect the heart shape of the frame, so I chose two flowers which looked symmetrical and arranged them accordingly.


Try not to keep your pressed flowers in direct sunlight as they'll start to fade, which would be a shame! Otherwise they can last for years, like mine have. Enjoy!

Sunday, 27 April 2014

Craft - Driftwood sailing boat

Whenever I go to the beach, I'm always collecting shells, sea glass and bits of driftwood. They usually end up sitting in a drawer gathering dust; shells look so much prettier when they're still wet, don't they? But this weekend I decided to try making a driftwood sailing boat. I made one a few years ago and I still love it. This craft is a great use for little odds and ends of fabric.


What you'll need:

2 pieces of driftwood - one for the hull and one for the mast
1 piece of material big enough for a sail
Little fabric triangles or bells for the rigging
String/ribbon
2 pins, drawing pins, tacks or staples

Step 1. Super glue your "mast" into your driftwood boat. Mine already had a notch in it for the mast to sit in, but you could easily gouge a bit out. Prop it up in the right position and leave it to dry. It can help to put a bit of blue tack on the bottom of the boat to help it stand up.


Step 2. Press a drawing pin or a tack into each end of the boat (you might need to tap them in with a hammer). These are to keep your rigging in place. I had run out of drawing pins so I had to improvise with a dressmaker's pin at one end and a bent staple at the other.


Step 3. Prepare your sail. Measure out approximately how big your sail needs to be and cut your material to size. If you have a nice straight mast this is quite easy as you can just make a right-angled triangle. My mast was all wonky, so it took a few attempts to get it looking right.

Step 4. Hoist the sail! How you do this will probably depend on what sort of fabric you're using. My fabric, apart from being hilariously retro, was very liable to rip. I tied a piece of string around the bottom of the mast before using a needle to thread it through the bottom left corner of the sail. I sewed it along the bottom of the sail and tied the other end of the string onto the pin at the end of the boat. I then tied the top corner of the sail directly to the top of the mast, carefully pulling it taut.

However, if your fabric is a bit more sturdy you can just make a little incision in each corner and use an individual loop of string to tie each bit in place.


Step 5. Make your rigging. Tie a piece of string or ribbon from the top of the mast to the pin or staple on the opposite side to the sail. For my first boat, I decided to make little flags by cutting little triangles of contrasting fabric and attaching them to the string with a simple stitch.

This time I made use of the little bells that come on the collars of Lindt bunnies. I looped the ribbon twice through each bell to keep it in place before tying it onto the staple.


These make such pretty decorations and gifts. The big boat currently lives on top of our bathroom mirror and the little one is going to sit on the window frame. They're very light, so it's easy to blue tack them in place. Have fun making your own!


Tuesday, 22 April 2014

His'n'Her doe and stag plates - Sharpie craft

This is a craft which allows you to be really creative and is a great way of displaying your skills if you're good at drawing freehand. When it comes to drawing, I am truly terrible, but it seems even I can turn a few permanent-marker lines into a woodland scene when I put my mind to it.

What you'll need:

  • A pair of plates - mine are from a cheap Ikea set, the rest of which was lost or broken at university.
  • A permanent marker pen - Sharpies are great!
  • Stencil (if you're using one)
  • Oven pre-heated pretty much as high as it will go (mine was at 250 degrees C)
Step 1. Decided on your design. I wanted my plates to work as a pair, so I decided on a stag and doe standing on either side of a tree in a romantic moonlight meeting. Equally, you could choose an abstract design, writing (a favourite poem perhaps?) or a pretty stencil.

Step 2. Sketch out design onto the plate with a pencil. It's a bit tricky trying to drawing on a plate because they're not flat, but at least with a pencil you can rub out any mistakes!


Step 3. Draw over your pencil lines with a permanent marker. Test out the best angle on a piece of paper first. It's a bit daunting drawing with something described as "permanent", but if you do make a mistake you can scrub it off with a damp tissue whilst it's drying.

Step 4. Put your plates into your pre-heated oven and leave for half an hour. This bakes on the permanent marker, making it even more permanent. Other bloggers say they've tried scrubbing theirs off after baking and it hasn't budged. I'm not sure I'd trust them in the dishwasher, but they'd be lovely for eating cakes, starters or cheese courses!

Wednesday, 16 April 2014

Wine bottle drip candle holders

This is a clever way of getting amazing-looking candlesticks without buying anything specially!


Step 1. Drink a bottle of wine, champagne, cava, prosecco, beer... it's up to you! The only requirement is that it has a glass bottle. After you're done, give it a quick rinse out. We've left the labels on ours because we thought they were pretty, but these also look cool if you wash the label off first by soaking it in some hot soapy water.

This is a nice way to commemorate a special occasion - you could use a bottle which will remind you of a wedding, birthday or the day you moved in.


Step 2. Pop in a candle. Most candles are actually a bit wide for wine bottle openings, but if you shave a little bit off the sides with a sharp knife it should fit nicely and won't wobble about.

Step 3. Start burning! Of course, wax candles are not really supposed to drip, but if you buy slightly cheaper ones then they tend to melt a bit faster. We also helped ours out a bit by poking at the edges of the candles in order to create more impressive drips... I'd recommend putting a mat down before doing this though (as our dining table will attest to).


Try to burn candles in different shades in order to get a really colourful effect. The candles in the pictures are from Tiger: http://www.tigerstores.co.uk/tiger_home/candles_lamps_clocks/dinner_candles_90784.html

They come in all sorts of colours and you can buy 3 for £1, which is amazingly cheap, and they last a surprisingly long time as well as being good for artful dripping.

Enjoy!